Making specimen jars has become a traditional Halloween ritual every year for me, right up there with carving pumpkins and giving out candy. It's actually hard to make a really bad one. I can have fun spending hours making little details or just create one in 5 minutes but both still look equally cool. What I really love is, they're so cheap to make. All you need is a jar, water, food coloring and some kind specimen. Creatures and things are especially fun to find or make and for next to no money. There will be many specimens posted about in the next few weeks but I thought I share details and some ideas based on this collection pictured above.
Overall, when I know several jars are going to be displayed in a small group, no matter how different the jars, keeping the cap color, fluid color and label style the same on each unites them in an interesting vignette ( the small worm jar cap above hasn't been rusted yet). I like to make a large pitcher of formaldehyde first, that way the color stays consistent in each. The recipe for this batch was 7 drops yellow, 1 drop green food coloring and watered down until looked good to me.
 Unknownus Creepus:I asked what this creature was the other day and...
CONGRATULATIONS
JOHN ROZUM!
It's a Massiff action figure from Star Wars: Attack of the Clones. Thanks to all who answered and the great possibilities as to what it is. You've all helped reinforce this tip... the oddest looking little toy can become a cool, mysterious, never before seen creature (especially to non-geeks, unlike John and I).
Every one's guesses are correct in a sense, this kind of specimen is fun to have as it leaves the storytelling to the viewer's imagination. The jar is one from an old spice rack set.
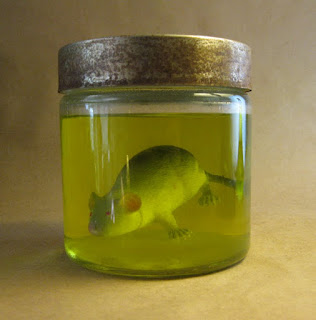
 Lab Rat: Colored fluid and distortion from the glass can make the lamest rubber creatures look pretty good. This is just one of 6 toy rats in a bag found for a $1.50 at, believe it or not, my corner mini mart way back in May. You never know what you'll find running into a store to pick up some milk for your morning coffee.
The jar is one of a set of various sized food containers from the bargain bin at a home goods store. I rusted up all the caps with some enamel model paint. A dab of clear silicone on his tail glued him in place half way in the jar so when filled with fluid, he looks suspended and floating.
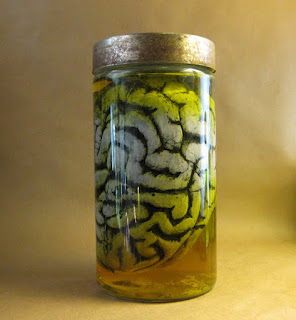
 Brain Jar: This is actually a painted NERF football. Years ago they had made some that looked like brains. I've had it in my stash for years. Being soft foam I could use a smaller jar and just mush it in there, making it organic looking pressed up against the glass.
The paint has peeled away here and there, with some flakes floating to the bottom. This is a happy accident helping it to look as if rotting a bit.
One tip using anything made of soft foam. It can act like a sponge so you may need to add more water later.
 Spiderous Giganticus: You can't go wrong with plastic bugs. Great size for small jars and many these days have great sculpts and look very real. Once again the glass distortion increases the creepy factor.
I gave this guy a dry brush of brown and gray enamel to bring out some details against his original all black plastic body.
His jar is just an old salt or pepper shaker. I sealed the cap holes underneath with garden hose repair tape and then filled them in on top with a few thick coats of paint.
The residue at the bottom, is actual rust from the inside cap edges over time from condensation. I love it, it adds texture.
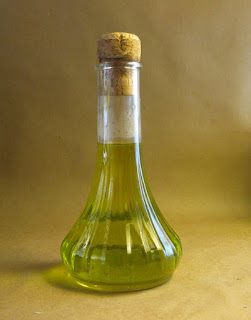
 Formaldehyde Flask: This is an ordinary, inexpensive, single flower plastic vase. Just by adding a champagne cork it instantly becomes a laboratory equipment.
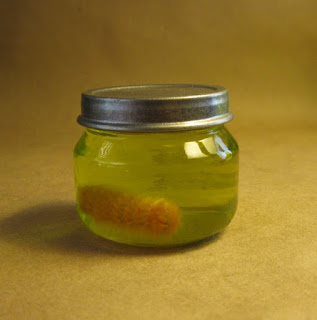
 Worm Cocoon: Baby food jars are terrific for little oddities. This fuzzy thing is just a coiled yellow pipe cleaner.
Like the Star Wars toy and flower vase, when certain objects are seen out of context, they can be believed to be as how you present them.

Sorry for the delay getting this posted, I'm running behind with my countdown.
ReplyDeleteSeriously, every time you post it's such a gem. This is brilliant!
ReplyDeleteI was close - had the right movie and planet.
ReplyDeleteOh well.
Very cool specimen jars.
These are fabulous! Pardon my ignorance here, but how does enamel model paint make the caps rusty? I am a prop noob. :)
ReplyDeleteVanessa,
ReplyDeleteThe paint does not actually rust the caps. I should of clarified, the rust is painted on. I stipple a little brown and orange color.
OH! Well, it's VERY convincing! :) Thanks for the details.
ReplyDeleteSo great, so gross... thx for the vase as flask tip!
ReplyDeleteI love your specimen jars. You have some great ideas and I am now inspired and looking at formerly ordinary things for possible specimens.
ReplyDeleteThanks for sharing your creativity.
Dave, This is my 1st year making specimen jars, and I couldnt be more stoked! thanks for the creative insight!!
ReplyDeleteWill the toys mold over time?
ReplyDeletecrumpled paper or fabric scraps work also--they swell up in the liquid and can look like creepy fauna
ReplyDeleteDave, i found some little grow monsters at $ store,but they won't stay standing in jars--if i want them to be standing in middle of jars vs stuck to one side,how would u suggest i do that? Thanks! This has been such a fun project to do--found giant dill pickle jar at GFS but gotta eat a lotta pickles!!!
ReplyDeleteCauliflower can also look like a brain with a bit of tweaking
ReplyDeleteWhat type of liquid goes in..water and ?
ReplyDeleteHi Dave, I'm doing an animation grad film about a girl making stuff into specimens. I was wondering if i can use your photos as reference, of course its just for the academic study not for commercial use:)
ReplyDelete