

I thought I'd expand on my John Rozum gravestone homage (created as a thank you for his fun one with my name last year). Here's a quick "How-To" of my Fed-Ex box grave making using basic craft supplies. It's a pretty easy and fast way to add a few last minute tombstones to your display (or you could just go buy some, but where's the fun in that).
Step 1: Go get yourself a FREE large overnight shipping box, any companies will work.
Step 2: Create a name plaque to go on it. First measure the space for it and then type up a template on the computer. Print out on sticker paper (large sheet label paper works great too).

Step 3: Stick the sheet on a piece of foamcore. Using an X-Acto knife create the engraved look by tracing the edges of each letter, cutting inward at an angle. Once the opposite beveled cuts meet in the center, the unwanted foam should just lift out cleanly. Trim the whole board into a plaque shape.


Step 4: Cut off the pre-glued closing tabs on the box because if used, they would create a bulky unwanted edge. Save them though, going to use later. Close only one end of the box using tape, covering all the seams.


Step 5: Spread the flaps on the other open end out, they'll become a base so the grave will stand. Here use the cut off pre-glued tabs and trim to size, attaching at the corners bridging the open flaps. This helps keep them in place and make a sturdier base. Then just hot glue the plaque on


Step 6: Give it 2 or 3 thick basecoats of exterior house paint using some random color you can waste. Dab the paint on to create a textured look.

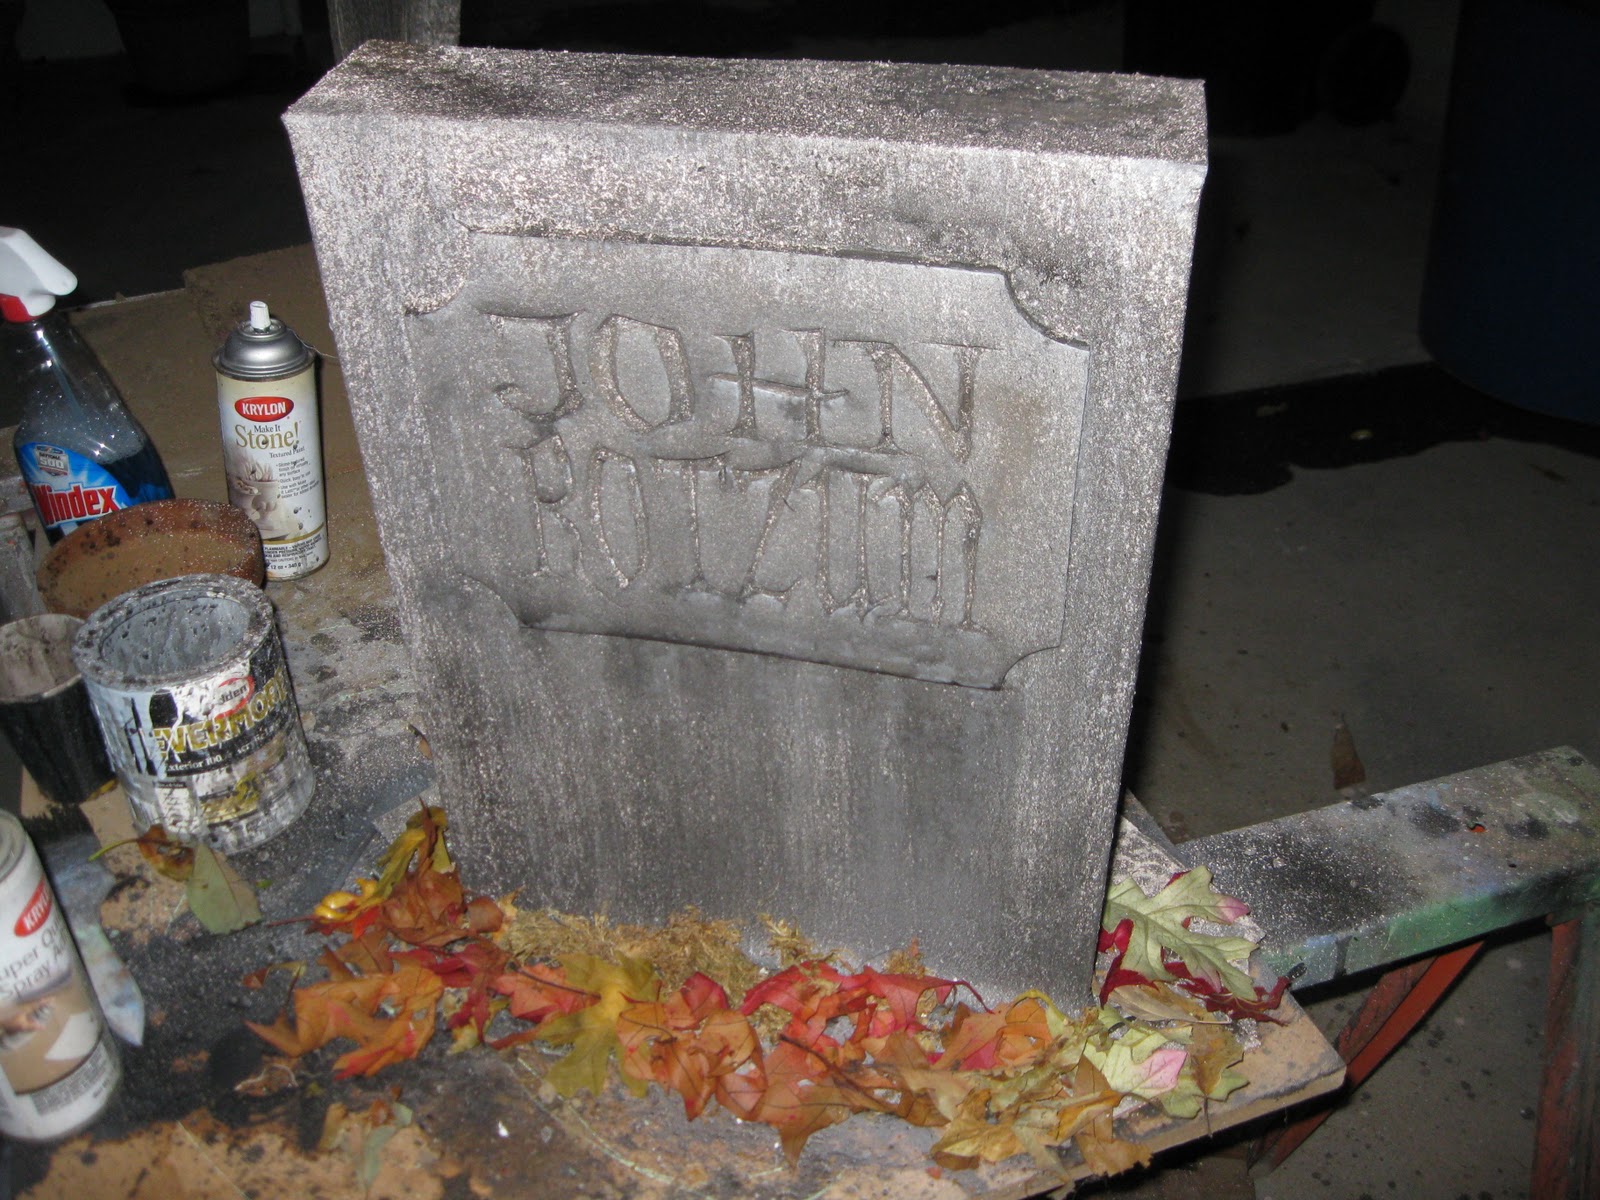
Step 7: After drying, paint it grey or tomb color of choice. Once that dries, give it a wash of watered down black for a weathered effect.


Step 8: This is optional, but for added texture, dust the whole grave with a light coat of faux stone effect spray paint ( I happened to have some so I used).

Step 9: As it dries, dress the base gluing on dirt and fall leaves (real or fake). Also a good time to sprinkle some dirt on the wet paint for extra aging if wanted.
Done. Let dry really well and place in yard using large nails pushed through the base to secure on ground.

That is awesomely simple! And cheap too!
ReplyDeleteWish I had more time this year. Next year will be my first yard haunt, so I will have all year to prepare.
Thanks for sharing.
Dave,
ReplyDeleteGreat, simple tutorial. Love the use of free shipping boxes. Now I don't have to wait to get a package in the mail.
I'm curious, though, what is the font you used on the plaque? Thanks!
Rich
Ghoulish Cop
ReplyDeleteIt's a font called Addams (good name and look). It's been around awhile, I've seen on a number of free download font sites. Can't recall where I got mine off hand. When I do I'll post a link.
Great idea, looks much better than the store bought ones.
ReplyDeleteWow... very cool. Thanks for the tutorial! Now to pick a name...
ReplyDeleteSeems like a lot of work. Why not go to Target and spend $9.99? Save yourself time, effort and it will look better than what you made.
ReplyDeleteI'm creating a holy Cemetery versus a cursed cemetery and I need to make some headstones that don't have creepy or rest in peace or Dracula on them so this is perfect.
DeleteAnoymous,
ReplyDeleteAs I wrote in the post, yeah, you could go buy one, but this is about the fun of making things. There is no effort if your someone who enjoys the process of creating props.
Yes, there are a lot of tombstones in stores you could buy that look better than mine, but this one is meant to inspire others and maybe make one that blows it away.
For the record...the cost of this prop, based on materials used is around $5.00, so I saved $4.99 and a trip to Target.
And not only that... You can Personalise it. :) Something you can't do with a store bought one. :D
DeleteI've seen a lot of tombstones, they are usually made of foam, I've never seen one for $10 that looked near as good as this one. They always look very obviously like a piece of foam... especially as the tiniest gust of wind blows them out of the yard. This one he has made looks awesome.
DeleteDave,
ReplyDeleteAnonymous is CRAZY if they think that any of those store bought Styrofoam things you can buy in a store looks half as good as they one you made!
Also, you can't customize the store bought ones nor are they as much fun as making your own!
The only downside i could see to it is that it might not survive to be used a second year (weather and all).
Wiccy,
ReplyDeleteTrue, the prop possibly not surviving
a second year is a downside especially if a rain filled October. Although this one did hold up to a few wet days really well. Hopefully though the making of is painless enough so remaking if wanted not too big a chore.
this would be really good for an indoor haunt, just like the one my office does every year. Thanks!
ReplyDeleteHi Dave!
ReplyDeleteI really love DIY Halloween sites and this one is great! Me and a friend of mine made a few props one year and just went ahead and spent a little extra on some poly-seal stuff. It weather proofs the props, so you won't have to worry about remaking them every year. we still have ours after a few years.
very nice tutorials .thanks for sharing this post.
ReplyDeleteFor texture, you might paper mache over the box (and add sand to your glue mixture) and then paint.
ReplyDeleteJust curious how do you do the watered down black for a weathered effect.
ReplyDelete?
Fyi...I love this diy project.it is really easy and I had lotsbof fun making it! Thought id share my experiment...I used usps box to try it out which is alittle smaller but worked since a only had a smaller piece of sytrofoam (that was just as packaging in a box!). Did a few coats of satin base house paint on it. Then seeing as I was so anxious to finish but didnt have any stone colored paint I ventured my house looking for something to substitute it. I came across some black colored hair spray and gave it a whirl...while right now its alil uneven in the color...it seems like with alil trial and error it might work on making that real stone effect. Plus I textured the last coat of paint I applied and the spray is helping to pronounce sime lines and cracks in the paint giving it what looks like a rocky effect...kike u said I gota perfect it alil but just thought id share it and say thanks! I totally love it!
ReplyDeleteWhere did you find that great font??
ReplyDeleteThis is a great idea but NOT for a place where it rains. Damn :(
ReplyDelete