
 One of my favorite projects in 2006 was redesigning the set for DIY's Craft Lab. I'll be honest, I was not happy with the set I did for the first season. This old post, Evolution of a Set, will give you a little backstory on that. I was thrilled to be told a new set was needed.
For the re-design I went back to my original idea that I believed had elements that would work.
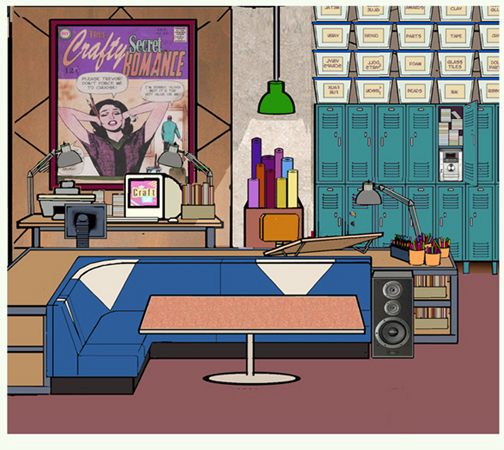
 I wanted the set to be a heavy industrial space softened by funky, bright decor. I also wanted it to be practical looking with real work tables etc. I had to consider a big new need, a space for "crafters"... 2-3 people to be working along with Jen (the host) and guest.
My budget did not allow for new construction so the first thing I did was play with the old set plans, rearranging the walls to be less cavernous than the first and knowing what worked last year and didn't.
 I committed myself to the darker wall colors I wanted, rusted metal and gray cement. I then worked on the larger furniture in the workspace. I also began to consider what kind of decor would compliment host Jennifer Perkins.
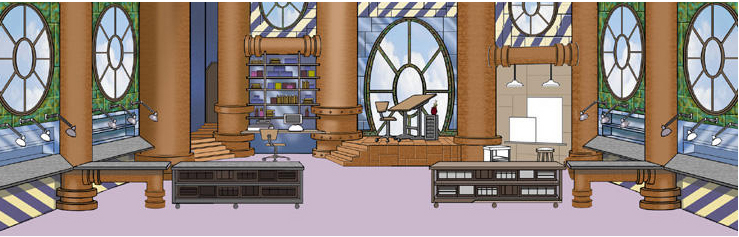
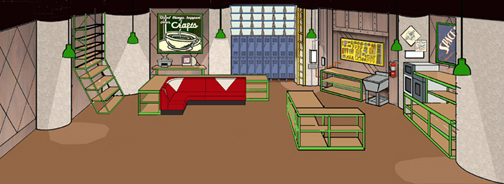
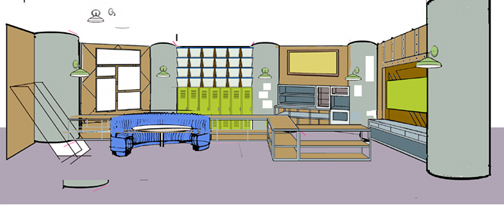 From the start I wanted old lockers, a retro diner booth for the crafters and some kind of large wall art. The below image was the one I used to first pitch my new design. Thankfully everyone liked where it was going.
 I abandoned the above long work bench idea. It was overkill. It would be great in a real workshop but not practical for t.v. filming. Everything began to fall into place and I finalized the layout and started in on the small details.
 The angled shelf unit idea on the left came from a broken one in the prop room that stood like that and I found unique looking. The one you see on the finished set is the one from the prop room.

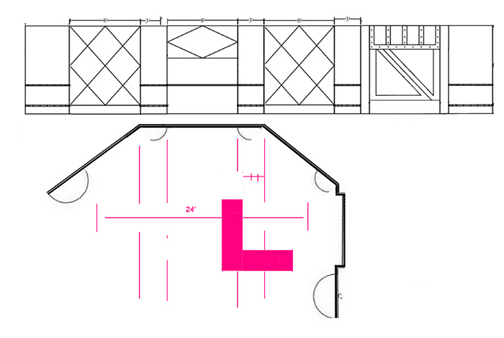
 Below is the final drawing submitted for approval. It was a rare career moment, everyone concerned gave it thumbs up. A DIY exec particularly liked the fun details such as the bowling trophy collection...that idea was inspired by host Jennifer Perkins who actually collects them.
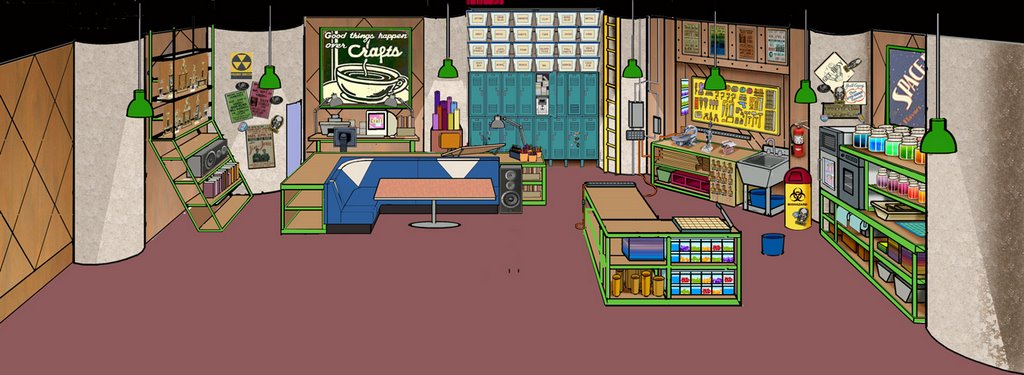 click on picture to enlarge.
The only issue of debate was the large wall art. My first idea was a pop art influenced collection of craft themed panels. The design was rejected.
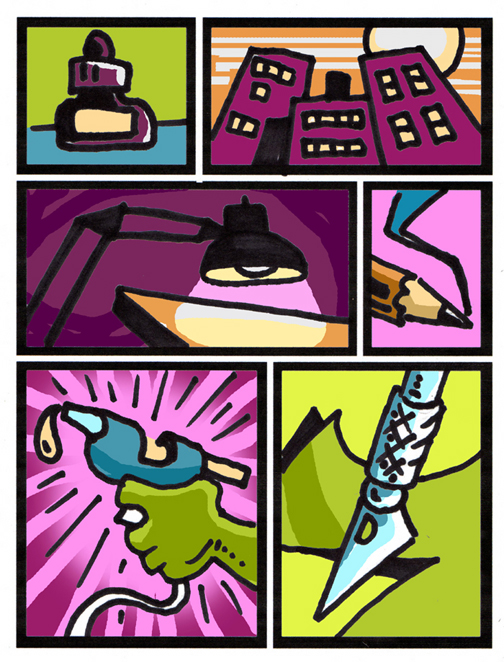 My second design was a craft themed 70's romance comic cover. The below image was a quick photoshop mock up borrowing a couple of images from old covers to sell the idea. I started to design one with my own original art but it was nixed before I could finish it.
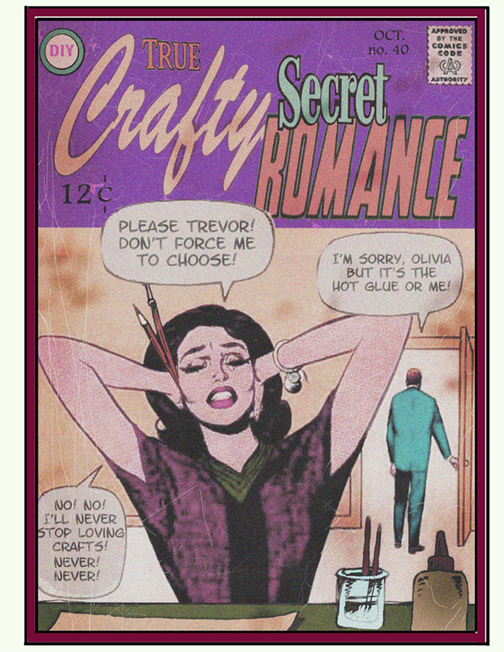
 In the end they liked the old diner sign I had in my first sketch. My assist Jason Garner designed the finished one below and I painted it on a 3'x3' canvas.
That's my own computer borrowed from home....cursed budgets.
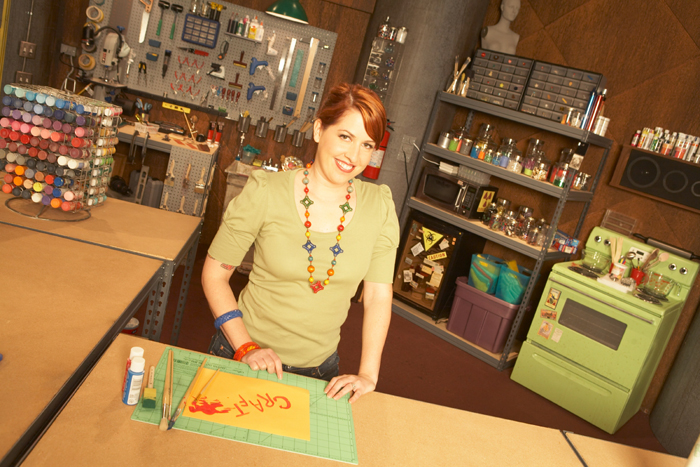
 I had alot of fun with the little details on the set. I imagined that the space evolved around making crafts, no thought put into the decorating. Finished projects and inspired clippings would be put down or slapped up anywhere. Supplies, tools and works in progress everywhere. I let extension cords run to tools and paint drips on the table tops be visible, because that's a reality in doing crafts.
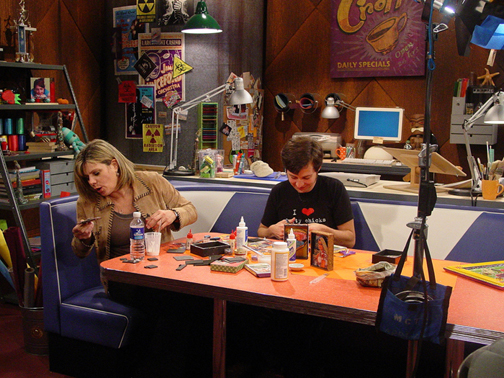
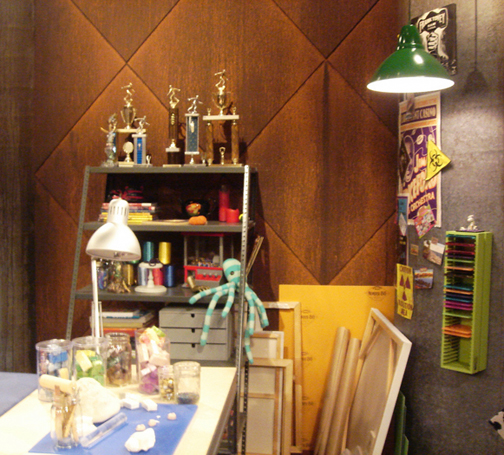


 Personally, I think a creative workspace is not complete without a mannequin torso.
 Many crafts involve oven baking so one was worked into the design. This guy was a cheap "as is" floor model... amazing what a coat of paint and new knobs can do. Jen Perkins is a big music fan so I threw in as much referance to it as I could, like the speaker.
 The artisans at the set shop, The Scenic Route, did a great job... retro fitting the walls, repainting everything with amazing aged faux finishes and brilliantly improving the large "sono" tube columns from last year by skinning with linoleum. The lino was glued on with the backside out and painted. As usual my talented partners in all things t.v. art dept, Andri Silanandra and Jason Garner were there every second to help. Especially keeping DIY's Uncommon Threads prop needs moving along, I was designing Craft Lab while we were shooting it.
 One thing I'll never forget with this re-vamp.
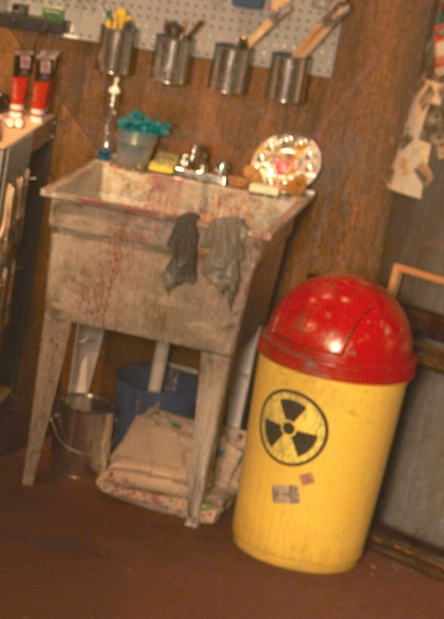
Last year a functioning sink with running water was needed for several episodes. It proved to be a big pain in the butt and never worked right. It's a simple enough t.v. trick: just run a garden hose from a spout and fit it to the faucet, and put a bucket underneath the sink for the water to drain into. Well, murphy's law proved true.
This time around I made it a personal mission to have the new sink work without failure. I had one person dedicated to it all day.
It worked perfectly so of course we used it only once.
 Craft lab is now airing daily on HGTV as well as DIY!
Wow, what a great behind-the-scenes look at how these sets are created! One sees them on TV and thinks they spring to earth fully-formed. So nice to hear the thought process behind the different design steps, as well as see them. And to know that your plan had to take into account "using what's available" and "budget constraints" is translatable to homeowners (and made for a funkier design!). Thank you for showing! Love the retro vibe A LOT. (And Yay! that HGTV has these shows on their roster now...)
ReplyDeleteI'm going to go back and read your whole post, but I just saw my first episode since it move to HGTV. One touch I noticed right away was the work sink and how it lookd used. I thought that was pretty cool. I had no idea you designed the set. Looking a just some of these pictures, I love your tool-holding peg board. I read posts by numerous crafters who say their #1 and #2 studio essentials are pegboard and a cutting table/work table at the proper height. Excellent work! Ok, back to reading. . .
ReplyDeleteThat is WAY more fun that the Knitty Gritty set!
ReplyDeleteAnd thank you again for all of your help the show I was on. I really appreciated all of your help and most importantly the words you said to me before I walked onto the set.
Beautiful set, and a great min-lesson in set design. Good work, Dave, as always.
ReplyDeleteBeautiful set, and a great min-lesson in set design. Good work, Dave, as always.
ReplyDeleteThis was clearly the most riveting blog posting you have done yet. Hee-hee. Oh I just linked your blog on my blog.
ReplyDelete